Installing mods with Mod Organizer 2 from NexusMods is pretty simple:
- Go to a mod’s page on nexusmods, I’ve picked my own Mothership Zeta Rehaul.
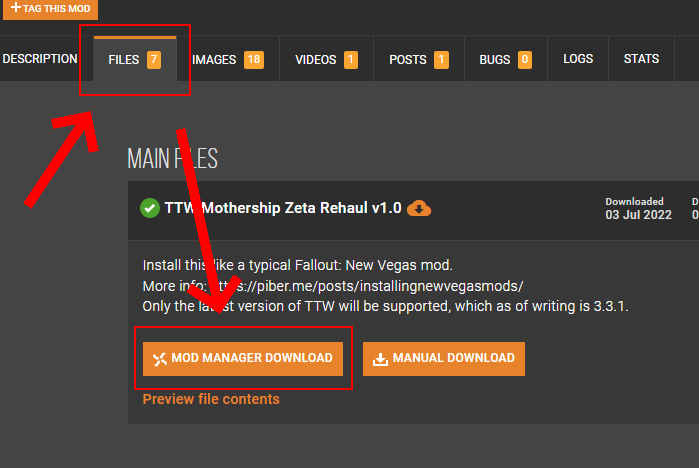
- Click the Files tab.
- Click the Mod Manager Download button of the desired file. If there is only a manual download button, download it that way and move to this page: Manual MO2 Mods

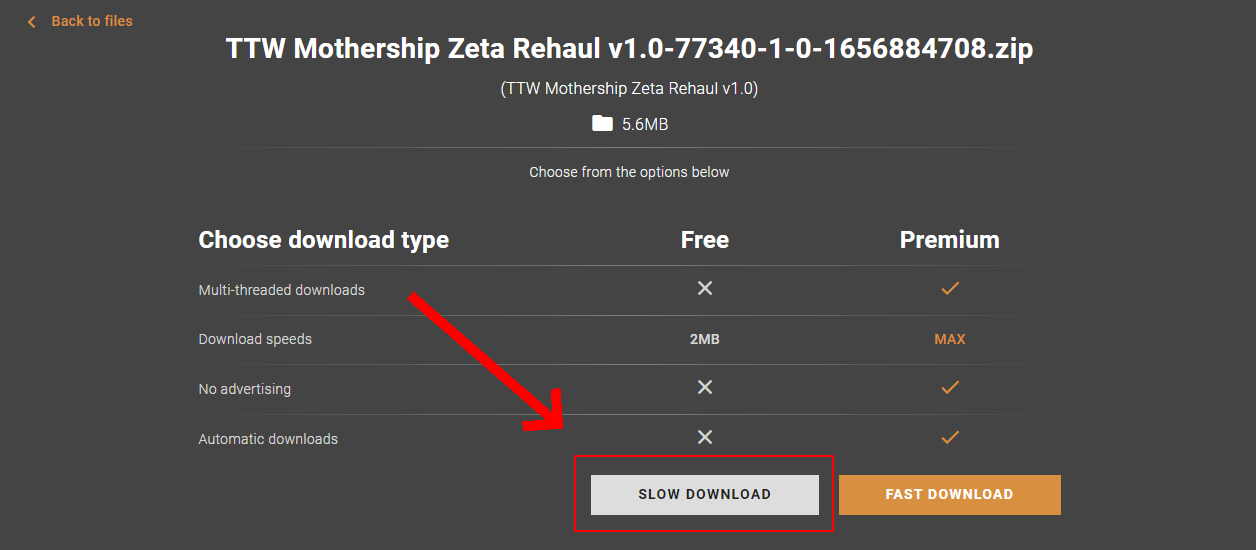
- Click Slow Download.

- Mod Organizer 2 should automatically open. If not, open Mod Organizer 2.

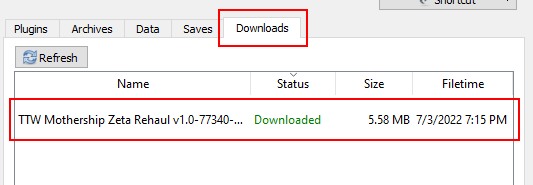
- Click on the Downloads tab on the right pane.
- Double-click the mod that was just downloaded.

- A window will open. You can choose the name of the mod here.
- You may be asked to replace an existing mod. If this is an update of the mod with the name you provided, choose replace. Otherwise, rename it to something unique.
- The mod you added will now be listed in the left pane. Enable the mod by pressing the checkbox.
- If the mod you installed includes .esp or .esm files, you can enable them in the right pane.
After following these steps, your mod should now be installed and enabled. Enjoy!